Showing posts with label DIY. Show all posts

Friday, March 9, 2012

DIY Foam Board Head Board


I've been working on redecorating my apartment and have loved torturing myself over all the details. But, I recently got a new bed and was really overwhelmed with the cost of an upholstered headboard.  I'd been researching going the DIY route, but everything I found revolved around plywood.  Well guess what...I have zero tools and I'll be damned if a cab will pick you up toting plywood sheets, not to mention the putting together of it all.  I had an 'AH HA' moment while wandering around one day and through FOAM CORE!  Lightweight, cut it with a knife, duct tape, staple gun, I'm in!  So here's how it works:

Materials:
- 1/2" Foam core / foam board - art supplies stores carry this. 
- Fabric - I used two yards of 54" width for a full-sized bed.
- Batting - I got four yards
- Staple gun - I got 1/4" staples, but looking back I should have gotten 1/2"
- Duct tape
- Scissors
- Knife or Exacto knife
- Measuring tape


Measure the frame of your bed and cut foam board accordingly.  Remember the batting and fabric will add an inch.  I purchased 40x30" board which worked perfectly.  Don't tell any of my cook friends, but I cut the board with a serrated knife.  Haha.  

Use a few passes of duct tape on both sides to connect the two foam board sheets.

 Lay down your batting underneath the board.  I used two layers leaving the outermost layer longer for wrapping/stapling.

Use the staple gun to staple all around.  I cut out the overlapping fabric at the corners so they wouldn't be thicker than the rest of the board.

 
 Drape your fabric so the pattern is level and centered.  I chose a print that did not have an obvious vertical direction so I could lay the two yards horizontally and not have a seam.

 Staple the fabric to the back of the board.  Lesson learned: 1/4" staples were barely long enough to go through the batting and fabric and still stick, so either have the fabric exceed the size of the batting or get longer staples---hence the duct tape for extra protection.

Instructions I found online suggested using 3M Command stickies to adhere the headboard to your wall.  This did not work for me.  The batting made the space between the foam core and the wall too great for good contact.  Still looking for another option, but for now the mattress is holding it in place quite nicely.
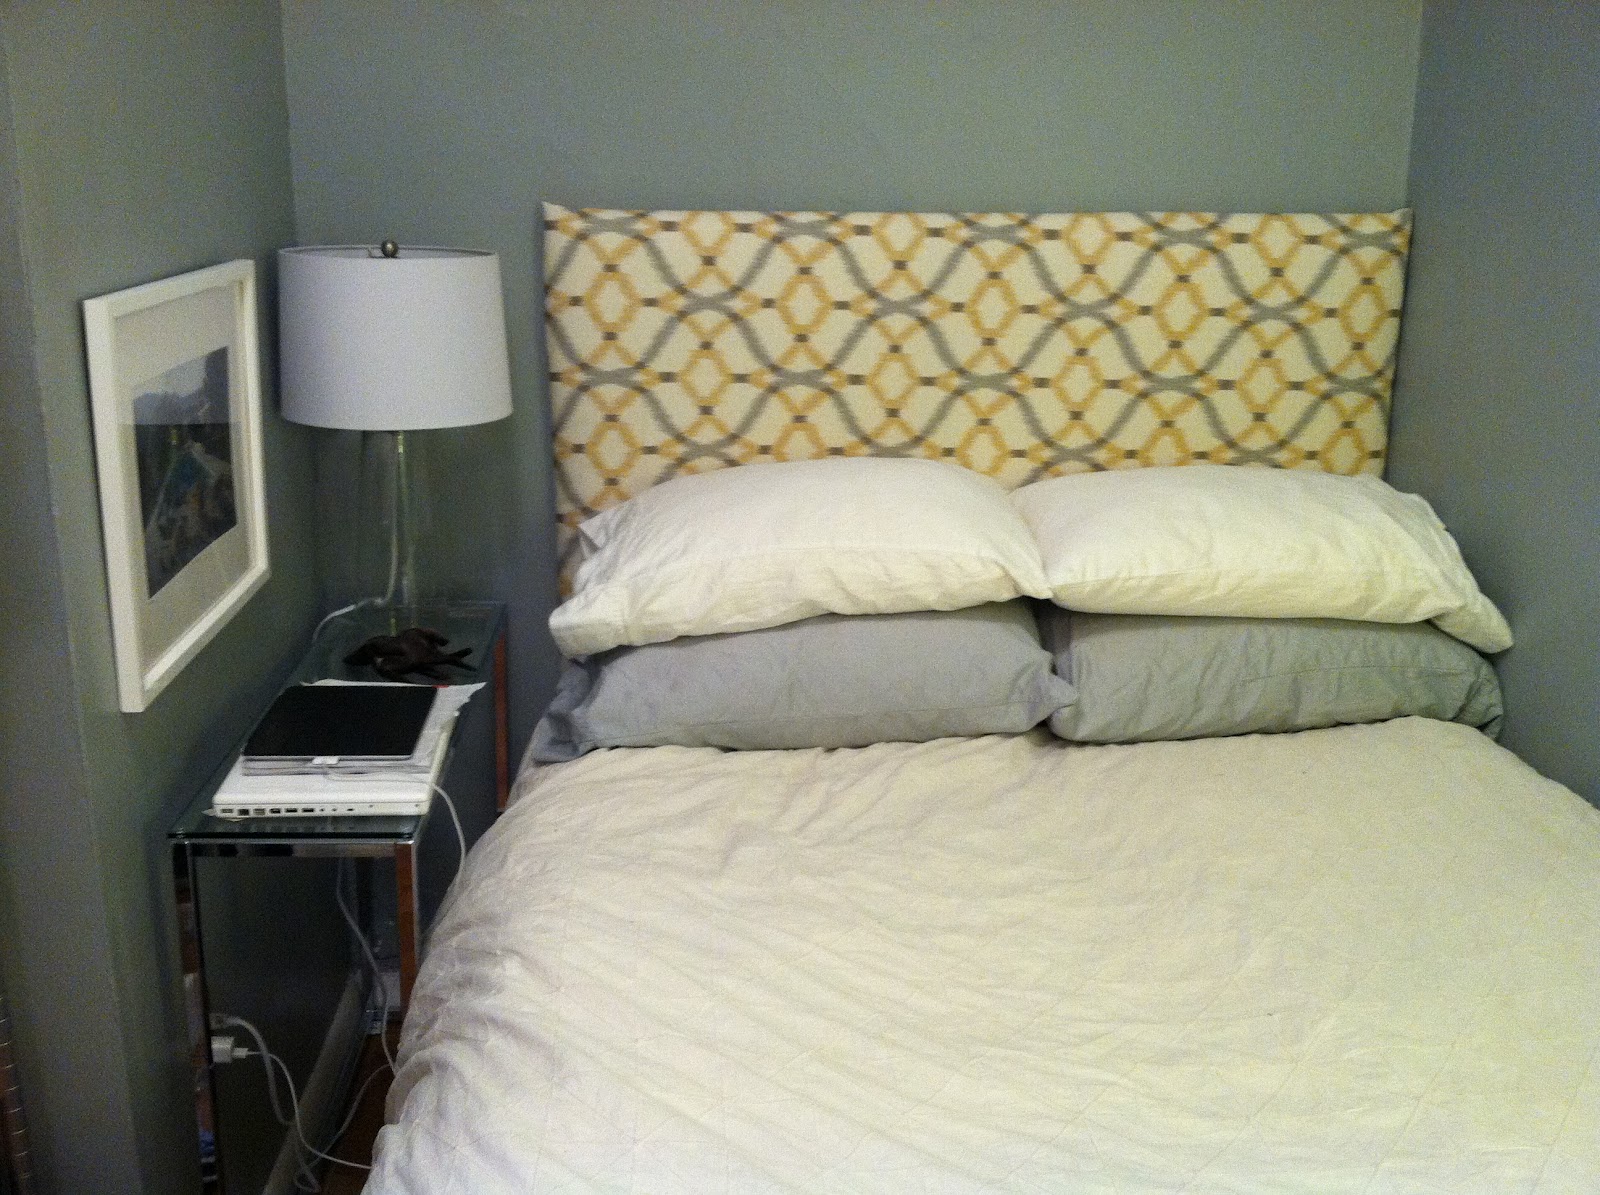
 TA DA!

Here's the cost rundown:
Fabric: $60 for two yards (from Mood)
Batting: $32 for four yards (also from Mood)
Foam Board: $30 for two 30x40" sheets (A.I. Freidman)
Staple Gun + Staples: $15
Duct Tape: $4
3M Command Strips: $6

Total: $147 and about an hour and a half of actual work.  SCORE!

Friday, February 10, 2012

The Un-Valentine's Day Card

I love Valentine's Day.  And not in an ooey gooey lovey dovey way (because I can't remember the last time I had a boyfriend over V-Day), but in a love my family, love my friends, life is good way.  I send Valentine's Day cards every year, so I was thrilled that my favorite website du jour, Design Sponge, had a few posts on crafty Valentine's Day projects.  I loved this sophisticated pink ombre card they made with watercolors, and I am in no way shape or form a pink person, but it just looked so cool and modern.  So, last weekend I headed to the art supply store and for about $30 I created truly unique handmade Valentines.  If that doesn't say love, then I don't know what does.

Materials: Watercolors, one wide brush, one thinner brush, watercolor postcards, gold paint marker

Use the wide brush to give the post card a good coating with water.


Load up the brush with red and draw a line across the top.


The water helps the paint travel down the card.

I found it better to help the paint along towards the bottom with the watery wide brush.

Let dry then repeat on the other side.  The cards curled up from the water then flattened out once dry.

Use the paint marker to draw a gold border along the edges.  This was a perfect finishing touch.  Use the gold for writing in a little message and the name & address.
Here's how Design Sponge pulled it off.  But, I though switching to postcards and the paint marker really simplified things.  Happy Valentines Day!! xo

Wednesday, August 17, 2011

Weekend Project: Blackboard Paint

Here's a nifty little weekend project.  I have a wall in my kitchen/living room that needed something.  I could have hung something lovely there, but the front door opens into it, and I was worried it would soon be knocked off.  And, it's a small room, so I'm trying to keep it fairly restrained.  Perfect solution: a painted blackboard wall.  I used Rust-Oleum's version in black, but I found many different colors and brands online.  It's cheap, I can doodle on it or write little notes to myself, and my roommate can draw a choice part of the female anatomy located between the arms (which he said he will most likely always do after he's had a few drinks).  Fair enough.  So, three days and $20 later, here we are.  Note: It takes four hours between the two coats then three days to fully cure, so a little patience is needed for this project.

All you need (+ chalk).
GREAT use for left over Christmas wrapping paper.
My victim.
Measure it out, and tape it off.
Two coats and three days later....
I used three little nails as a chalk ledge.

FYI: My wall is painted Benjamin Moore Jalapeno Pepper, which is unlike any jalapeno I've ever seen, but I love the fresh green just the same.


Thursday, April 1, 2010

DIY: The Perfect Cut-Off Denim Shorts


Want to look totally 'now' this spring?  Put away your wallet.  For guys and gals alike, the most coveted wardrobe item this spring are the cut-off jean shorts.  I have been seeing these everywhere: over tights, bare leg, with booties, with sandals, for day, for night.  So, banish your belief that these are for the trailer park and tramp stamp set.  Pair with a tee, cardigan, and great bag for day or anything dark with sparkle for night.  Just stay away from making them too short.

Here's how to make the perfect pair:

1- Find the pair to sacrifice. My vote is anything hanging out in your closet with a flared leg or major distressing that screams 2004....er, not that I have anything like that in my closet.  Stay away from high-waisted unless you want to look like you have the longest bum in the world and an enormous fupa.

2- Put them on and mark an inch below each knee.

3- Cut each leg just above the pencil marking.  I recommend kitchen shears.

4- Try them on between each cutting.

5- Keep cutting an inch or two off at a time until you like the length and both legs are even.  Remember---you can never make them longer.

6- Go outside and get some sun on those pasty stems!

Image courtesy of J.Crew.com

Tuesday, February 9, 2010

D.I.Y. Proenza Schouler Tie-Dye

Oh those crazy Proenza Schouler boys....just look at what they are up to now! Tie-dye? You must be asking yourself, "Really?" Just wait, my friend, this is not the tie-dye you remember from experimenting as a kid or the wardrobe staple of Greatful Dead dead heads. PS's dye job looks much more tribal or even surf-chic with bright yellow, teal, blue and black to give it an edge. These frocks and tops cost a pretty penny and will definitely not be in the Shitty Chic-er's budget (trendy + designer = no way). But, leave it to the lovely ladies at WhoWhatWear.com and PS I Made This to combine their crafty forces to replicate the tie-dye shirt shown in Proenza Schouler's S/S 2010 collection.

Proenza Schouler shirt - $375

Your creation - under $50

Here is how DIY made it:

HORIZONTAL STRIPE SHIRT WITH RAGLAN DETAIL

Ingredients:
-Rubber Gloves
- Tulip Tie Dye ($5) in Black, Blue, and Yellow
-American Apparel Sheer Jersey Long Sleeve Tee ($26)

Directions:
1. Lay the shirt down on a flat surface. Insert a piece of cardboard in between the layers, so the dye does not bleed through from the front to the back!
2. Spray sides of the shirt with the Yellow fashion dye creating two outer panels of color.
3. Spray the middle section of the shirt with the darker contrasting color (in this case, the Blue fashion dye). It's ok if the color overlaps a little bit—we think the bleeding looks cool!
4. Let it dry flat (for approximately thirty minutes; it's ok if it’s a bit damp, as it will help the color bleed) and repeat first three steps on the backside of the shirt.
5. Once it has dried, gather the shirt in very thin vertical sections, grabbing from the neck and the bottom of the shirt (to create an accordion effect!)
6. Finally, make thin horizontal lines with the Black fashion dye (with tip applicator) across the gathered accordion surface using the tip of your tie dye bottle nozzle. Repeat on the sleeves.
7. Again, our master crafter recommends you wait for the shirt to dry for three days before washing, according to the directions on the tag. For peace of mind, wash it in like colors or all by itself first!

Click here for the whole shebang on WhoWhatWear.com.

Pictures courtesy of Style.com and psimadethis.com. Instructions from psimadethis.com
Related Posts with Thumbnails